Automating Deployment with Travis CI
• • ☕️ 4 min readCreating a CI/CD (Continuous integration/Continuous deployment) pipeline for your open source GitHub project is easy & free!
Step 1 - Login to Travis CI with Github
Step one is super easy! Just go to https://travis-ci.org and sign in with your GitHub account.
Step 2 - Enable Travis CI for your repository
Look in the list of repositories and flip the switch for whatever repository you want to build a CI/CD pipeline for!
Note: If you don’t see your repository here, make sure it is a public repository. Travis CI is NOT free for private repositories.
Step 3 - Create an IAM user in AWS
- Login to AWS and navigate to IAM and click on the Users option in the menu on the left.
- Click “Add User”
- Name the user something to the effect of
travis-s3 - Choose “Programmatic Access”
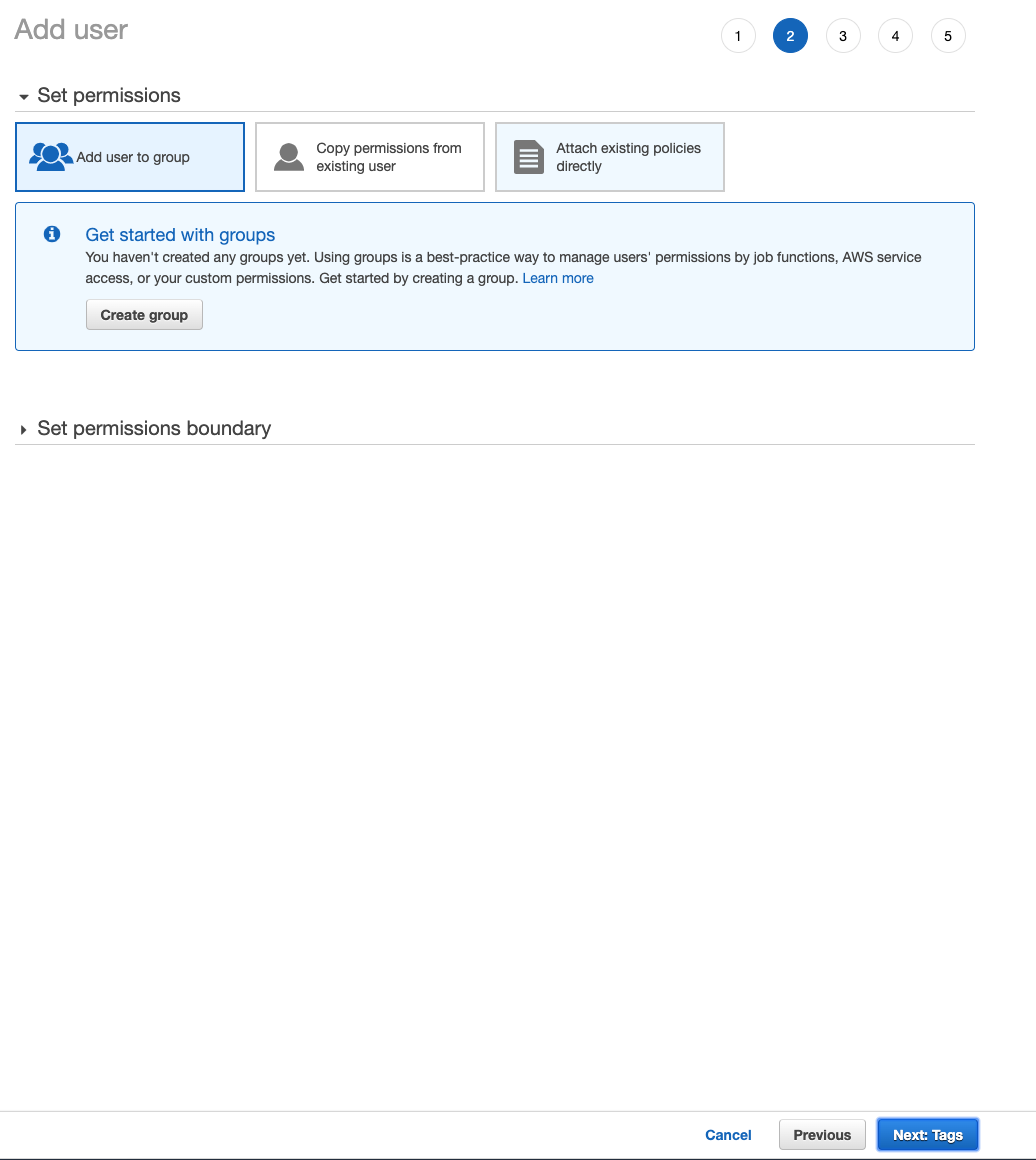
- Assign permissions

Choose “Attach existing policies directly”.
Search for “s3” and choose “AmazonS3FullAccess”

This policiy might have a little more than we need, but you can always go back and do more fine grained permissions later.
Click next.
Here you can assign tags to the user, you can skip this step if you want.
Click Review.
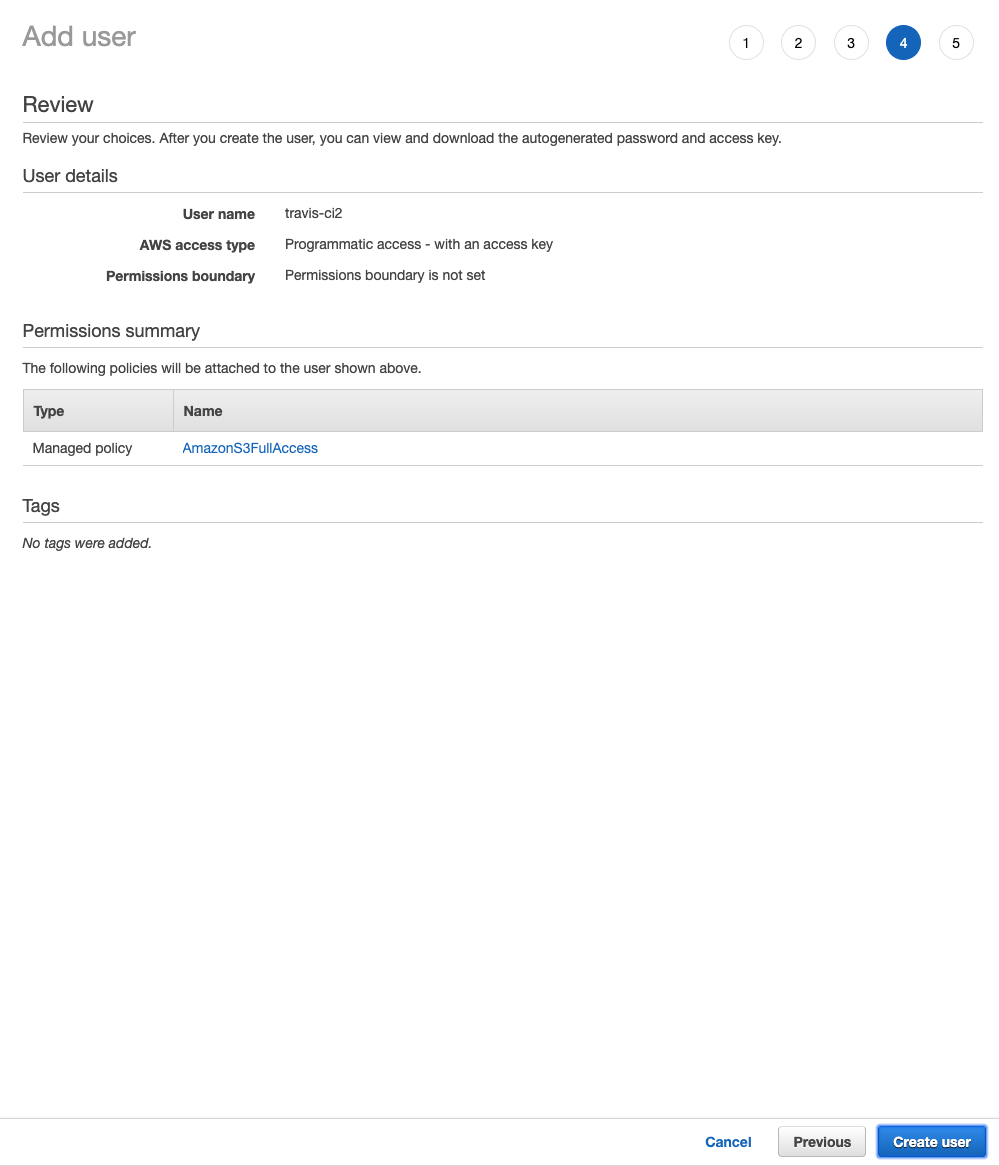
Make sure everything looks correct on this screen. The user should have a single permission called AmazonS3FullAccess

Click “Create user”
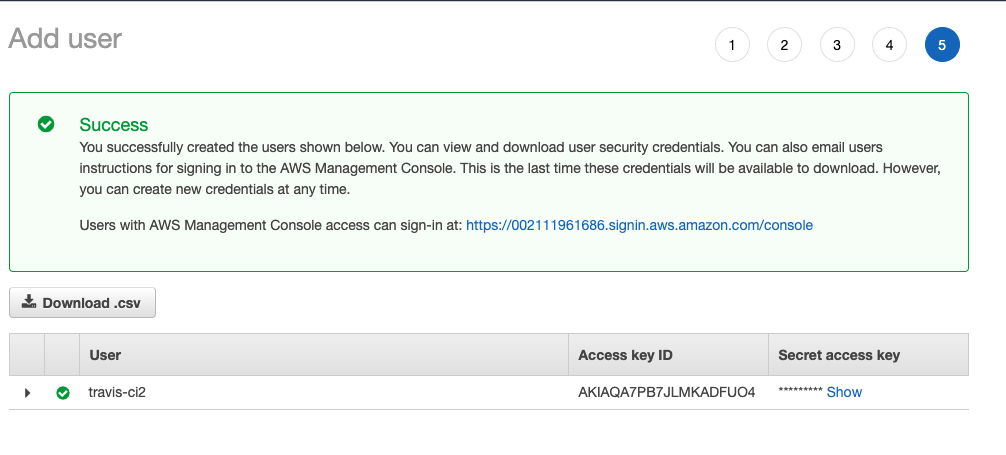
Your user is created!

Before moving on, copy the Access Key ID and Secret Access Key. This is the last opportunity you will get to see the secret access key.
Step 4 - Create your pipeline
Disclaimer: Since I recently did a post about how to host your React site on AWS S3 for virtually no cost, I will be going over the deployment process for that stack.
Create a .travis.yml file
This file should be in the root of your project.
This is just the base travis file. All we are doing here is setting up some prerequisits that we have for building our project.
language: node_js
node_js:
  - "13"
branches:
  only:
  - master
cache:
  yarn: true
install:
- yarn install
script: yarn build
Add S3 deploy
This tells Travis what to do with our code once it is done compiling.
Make sure to replace blog.kalob.net with your bucket name and Porterk/kalob.net-blog with your username/repository from GitHub
deploy:
  provider: s3
  access_key_id: $AWS_S3_ACCESS_KEY
  secret_access_key: $AWS_S3_SECRET_KEY
  bucket: blog.kalob.net
  skip_cleanup: true
  local-dir: build
  acl: public_read
  region: us-east-2
  on:
    repo: PorterK/kalob.net-blog
After the deploy, invalidate CloudFront
In order to get this working, you wan to use the after_deploy option:
after_deploy:
  - travis-ci-cloudfront-invalidation -a $AWS_CLOUDFRONT_ACCESS_KEY -s $AWS_CLOUDFRONT_SECRET -c $AWS_CLOUDFRONT_DIST_ID -i '/*' -b $TRAVIS_BRANCH -p $TRAVIS_PULL_REQUEST
Also, under install add:
- yarn global add travis-ci-cloudfront-invalidation
We will need to add AWS_CLOUDFRONT_ACCESS_KEY, AWS_CLOUDFRONT_SECRET, AWS_CLOUDFRONT_DIST_ID, AWS_S3_ACCESS_KEY, and AWS_S3_SECRET_KEY as environment variables in Travis.
For this step, you should follow Step 3 to create another user, but choose CloudFrontFullAccess for the permission set.
In the Travis dashboard, click on settings, and look for this:

Fill out the environment variables. You can find your CloudFront distribution ID in the CloudFront console.
Your final YAML file should look something like this:
language: node_js
sudo: required
node_js:
- '13'
branches:
  only:
  - master
cache:
  yarn: true
install:
- yarn global add travis-ci-cloudfront-invalidation
- yarn install
script: yarn build
deploy:
  provider: s3
  access_key_id: $AWS_S3_ACCESS_KEY
  secret_access_key: $AWS_S3_SECRET_KEY
  bucket: blog.kalob.net
  skip_cleanup: true
  local-dir: build
  acl: public_read
  region: us-east-2
  on:
    repo: PorterK/kalob.net-blog
after_deploy:
- travis-ci-cloudfront-invalidation -a $AWS_CLOUDFRONT_ACCESS_KEY -s $AWS_CLOUDFRONT_SECRET -c $AWS_CLOUDFRONT_DIST_ID -i '/*' -b $TRAVIS_BRANCH -p $TRAVIS_PULL_REQUEST
Step 5 - Done!
Push your code up to master and watch the build take place!
Travis CI builds usually take a few seconds to startup, so don’t worry if it takes a second.
Thanks for reading! For more content, or for any questions or comments, please reach out to me via Twitter